Customize Your Dashboard Settings
Once you are logged in, you can begin accepting calls. The following customizations are optional, but recommended:
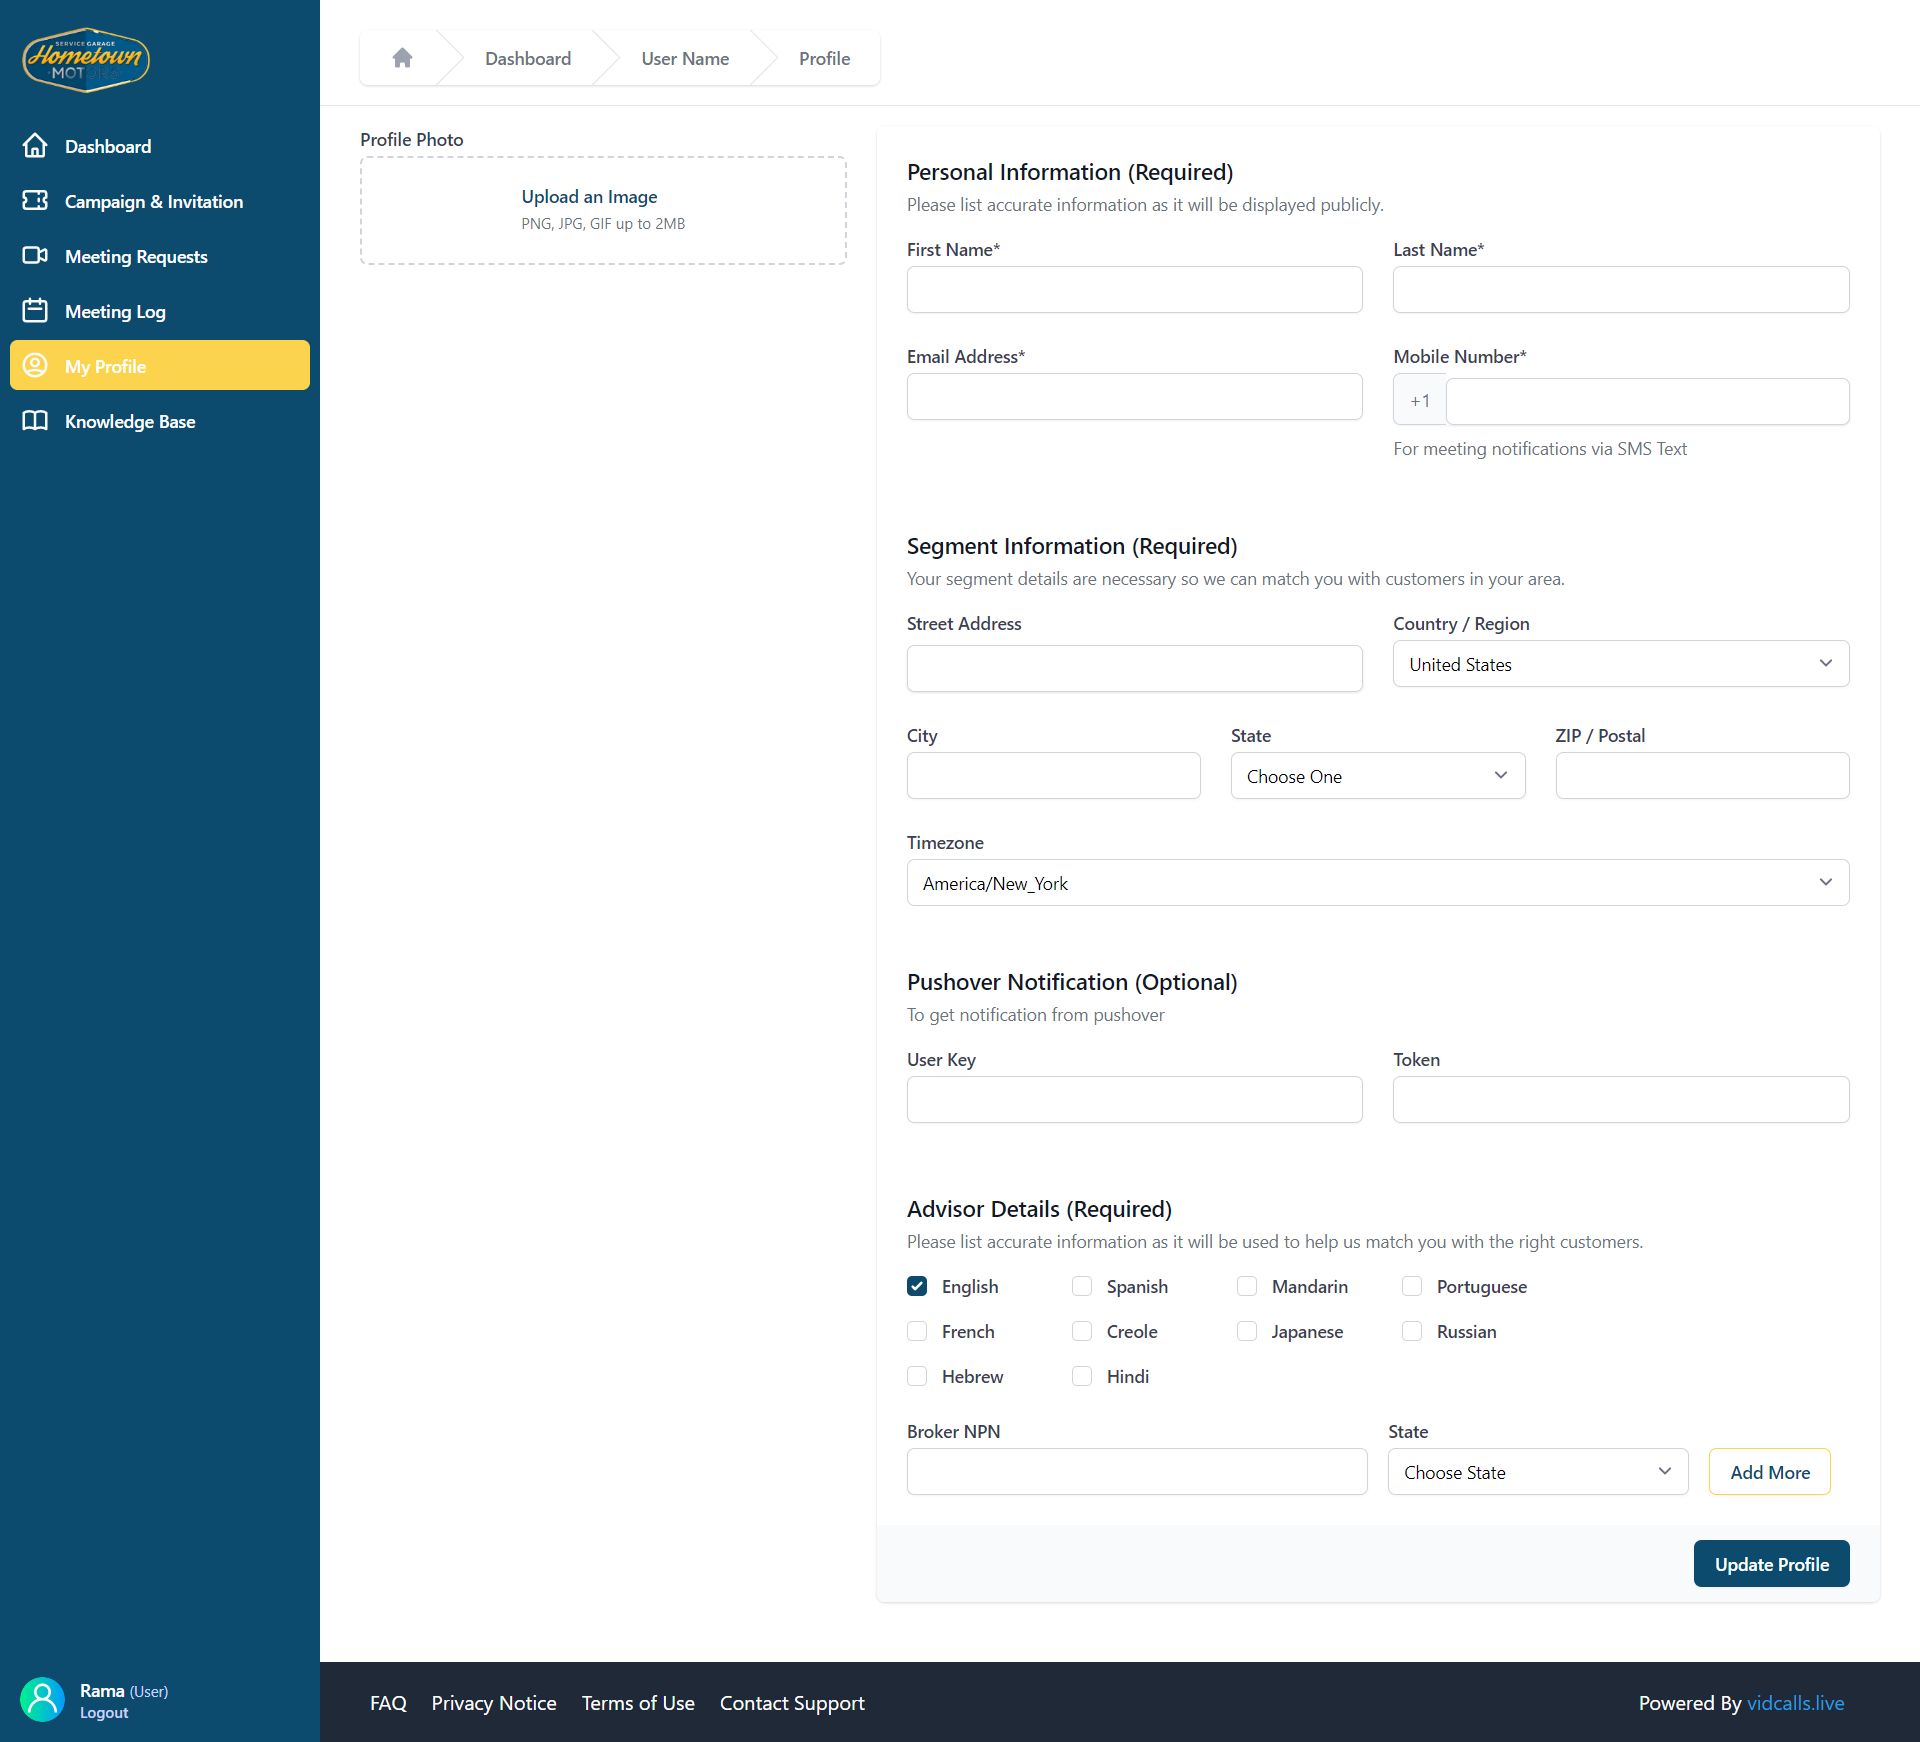
The Dashboard tab gives you quick access to information and data about your Vidcalls activity.
The Campaign & Invitation tab shows you which campaigns you’re a part of. Your administrator will add you to campaigns so if you don’t see the campaigns you want to be a part of, please contact your sales manager or admin.
Meeting Requests shows you meetings that you can accept, but you shouldn’t rely on this as a notification tool. It’s best to make sure your notifications settings on your desktop and hand held device are enabled.
The Meeting Log tab shows your history of meetings as well as unsuccessful connections.
In the Profile tab, there are a few steps we highly recommend you perform:
- Upload an image in the top left corner of this tab so customers can see what you look like before they connect.
- Add all personal information. Adding your email and phone number allows you to accept customer connection requests to your email and on your phone, respectively.
- Ignore all Segment information. This is for national campaigns.
- To add push notifications to your mobile phone, you’ll want to add the Pushover User Key and Token. Please see the next tab named Add Push Notifications, for those instructions.
- Leave the Advisor Details empty, even though it may be labeled Required.
Be sure to click the blue Update Profile button at the bottom of the page each time you make changes to this content.

[ultimate_spacer height=”30″]
Finally, to accept notifications on your desktop, the Vidcalls dashboard must be open on your browser. You can minimize the screen or open it in a different tab, but if the dashboard is closed, you will only receive notifications on your phone—if push notifications are enabled. For this, see next step, Add Push Notifications.


