Video Chat Advisor Onboarding

Welcome to Video Chat. This tutorial will show you how to register for Video Chat so as a Sales Rep, you can accept face-to-face customer inquiries right from your computer.

If you are a Sales Rep, we’ll refer to you as an Advisor throughout this tutorial. Keep in mind, your Administrator can customize your Video Chat interface so although we call you an Advisor, your Administrator may refer to you as Sales Rep, Team Member or something else. Regardless, the steps for set up are the same.

If you’re an Admin, you can follow this same tutorial to register your Sales Reps for them. You’ll just need to provide them with their login details once finished.

From top to bottom, click on each tab to the left (on desktop) or below (on mobile), starting with REGISTER.

Register

Registration for Video Chat is by invitation only. You will be given a link by your Administrator to register yourself.  If you didn’t receive that link, please contact lendhisupport@videoshaleschat.com.

  1. Click on the custom link you’ve been given. It will take you to a registration page. Simply fill in the fields on the Registration page to create your account (see screenshot below).
  2. Enter your first name, last name and email. Create a password and enter it in the password field. It will be used to access your Video Chat dashboard.
  3. Click the blue Create Account button at the bottom of the page and check your email for your confirmation. You won’t be able to register without doing so. If you don’t see the email, be sure to check all folders including your Spam folder. The email will redirect you to a login page where you will need the password you just created. This will grant you access to your own Video Chat dashboard as you’ll see in the next step, called LOGIN.

Login

Use your email address and password to login to your dashboard.

s2. Login

Customize Your Dashboard Settings

Once you are logged in, you can begin accepting calls.  Your administrator will add you to the campaigns for which you can participate.

You can customize your dashboard by following the instructions below. They are not required, but recommended to get the most out of Video Chat:

The Dashboard tab gives you quick access to information and data about your Video Chat activity.

The Campaign & Invitation tab shows you which campaigns you’re a part of. Your administrator will add you to campaigns so if you don’t see the campaigns you want to be a part of, please contact your sales manager or admin.

Meeting Requests shows you meetings that you can accept, but you shouldn’t rely on this as a notification tool. It’s best to make sure your notifications settings on your desktop are enabled.

The Meeting Log tab shows your history of meetings as well as unsuccessful connections.

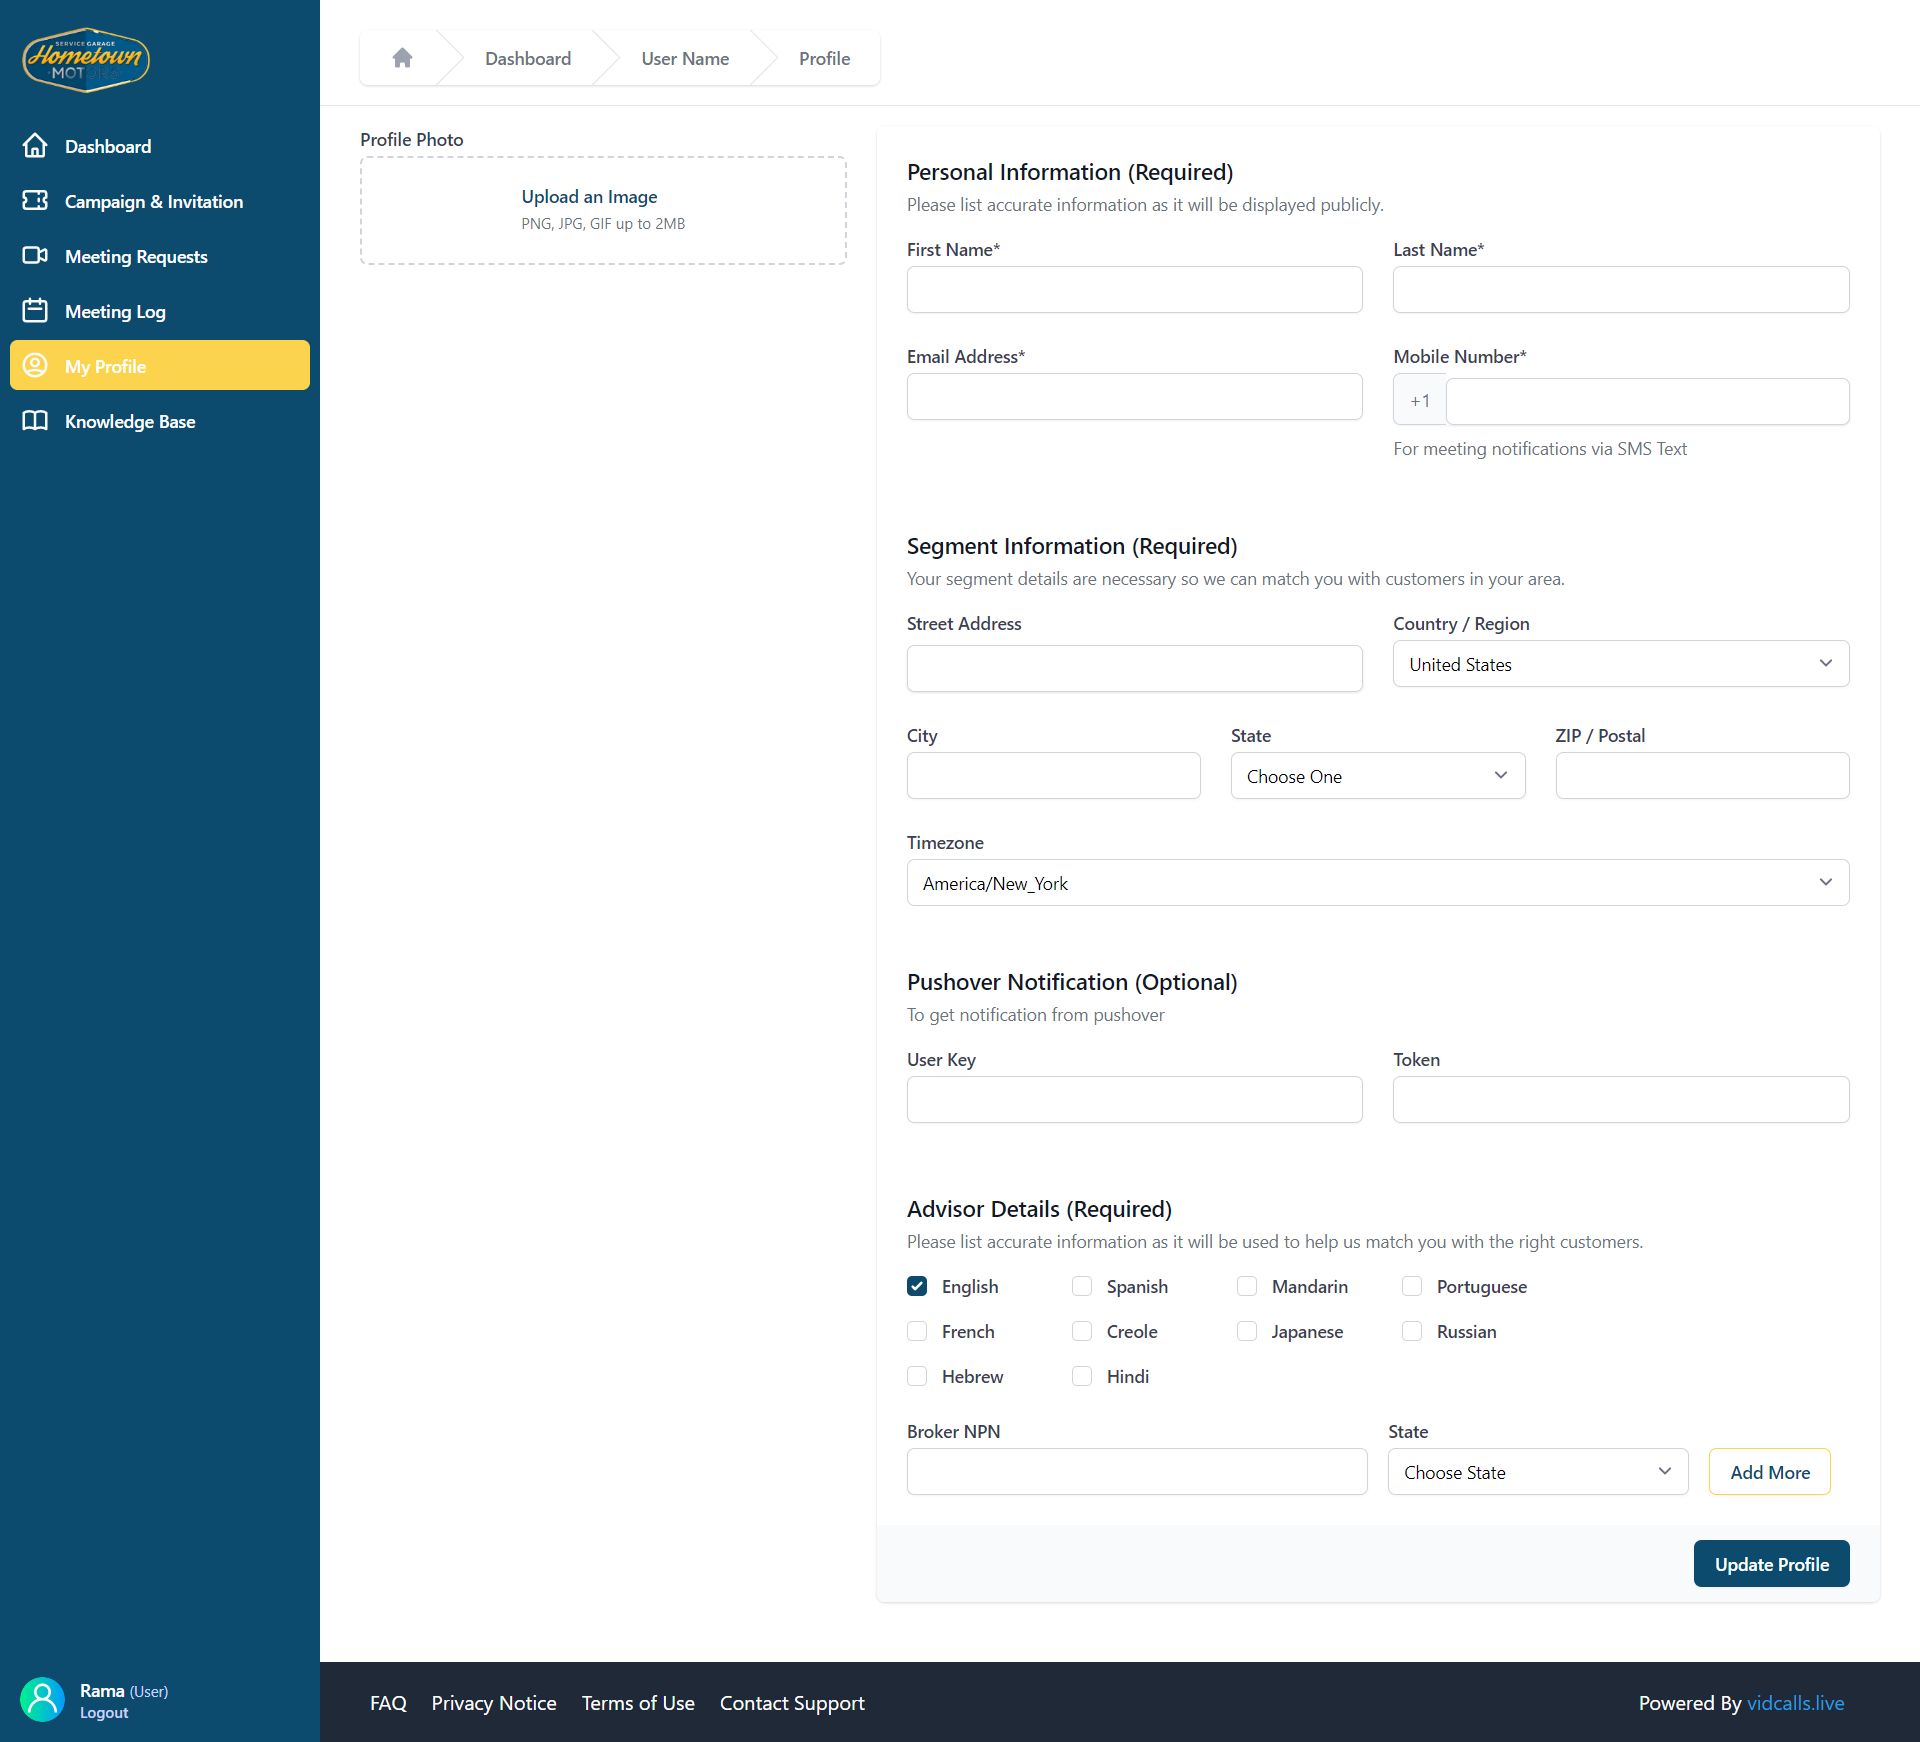
In the Profile tab, there are a few steps we highly recommend you perform:

  1. Upload an image in the top left corner of this tab so customers can see what you look like before they connect.
  2. Add all personal information. Adding your email and phone number allows you to accept customer connection requests to your email.
  3. Ignore all Segment information. This is for national campaigns and doesn’t apply to you.
  4. You can also ignore the Pushover User Key and Token.
  5. Leave the Advisor Details empty, even though it may be labeled “Required.”

Be sure to click the blue Update Profile button at the bottom of the page each time you make changes to this content.

[ultimate_spacer height=”30″]

NOTE: To accept notifications on your desktop, the Vidcalls dashboard must be open on your browser. You can minimize the screen or open it in a different tab, but if the dashboard is closed, you will not receive notifications and will miss calls.