Add advisors to meeting campaign
How to Add a Advisor to your Campaign & Segment
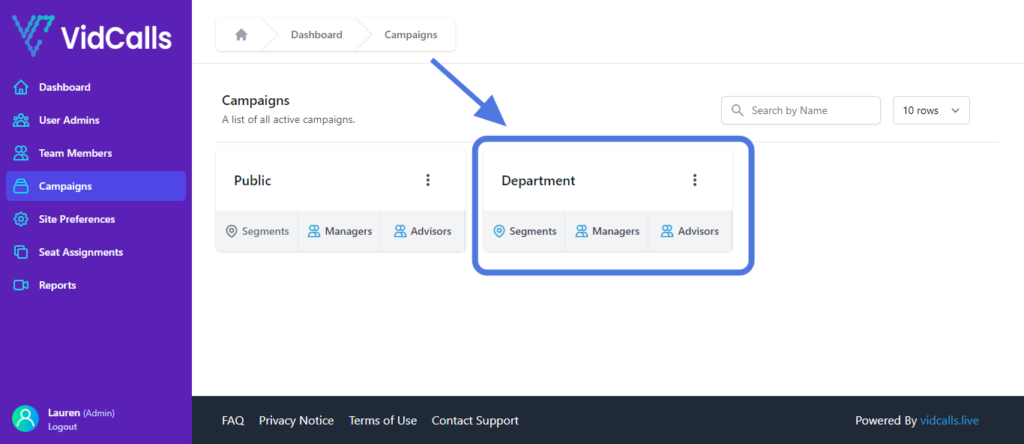
- Go to Vidcalls.live | Admin Dashboard
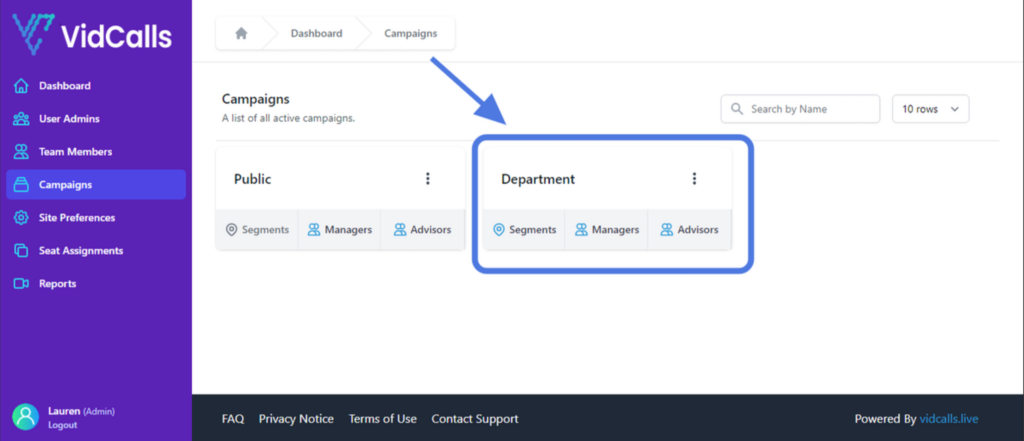
2. Click on Campaigns
3. Under Departments Campaign
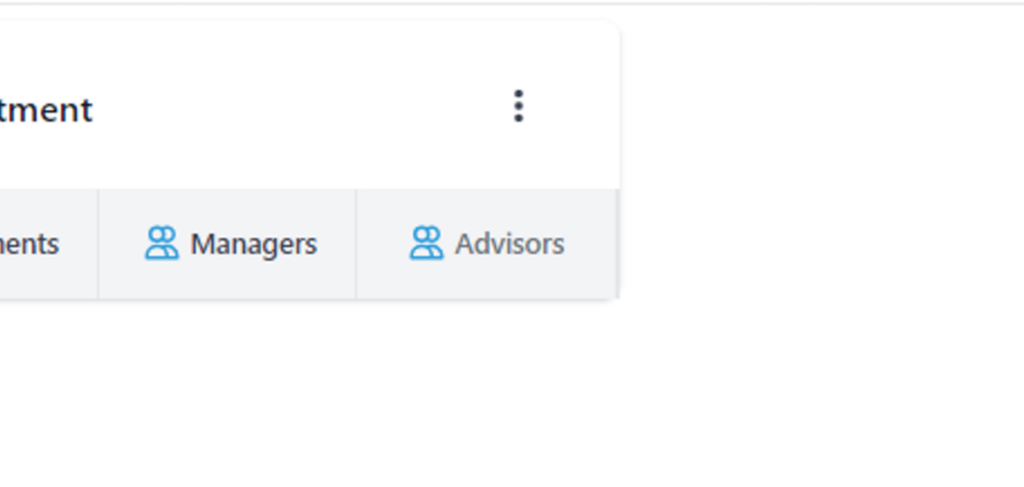
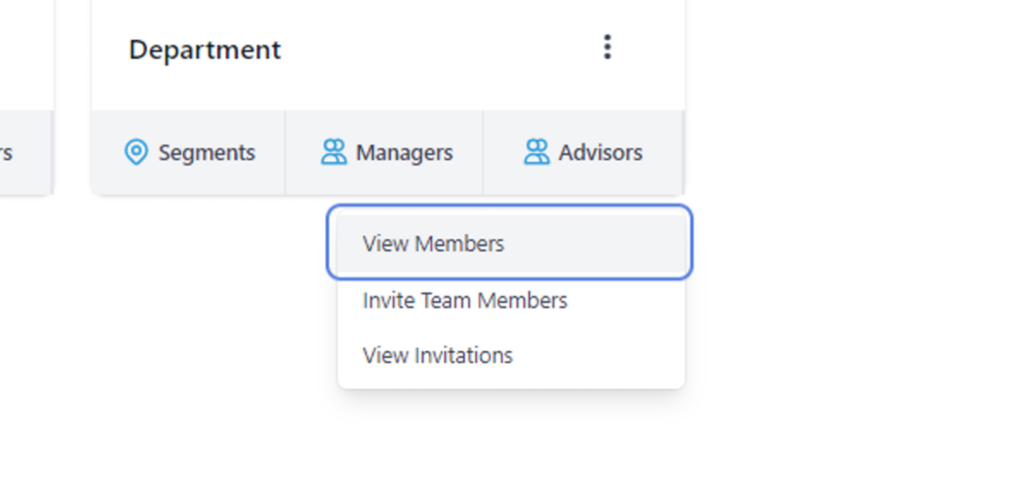
4. Click on Advisor
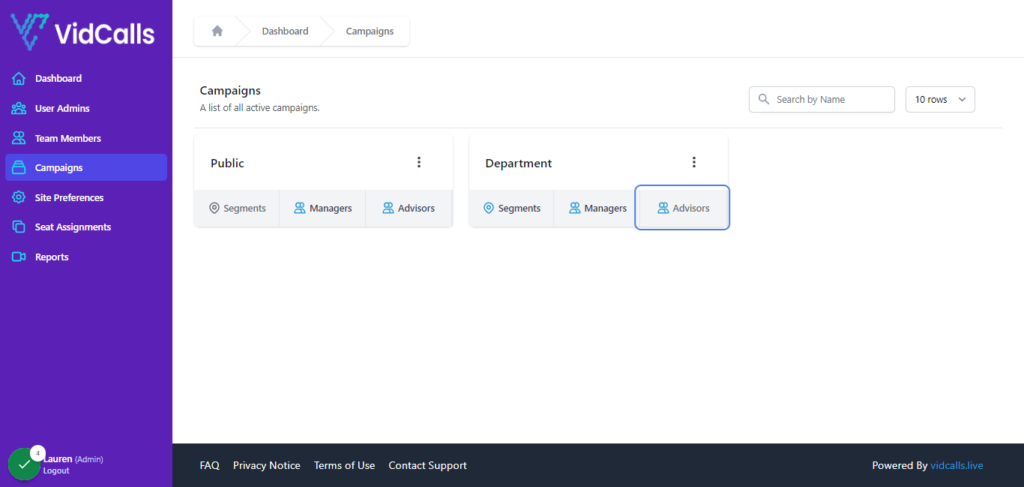
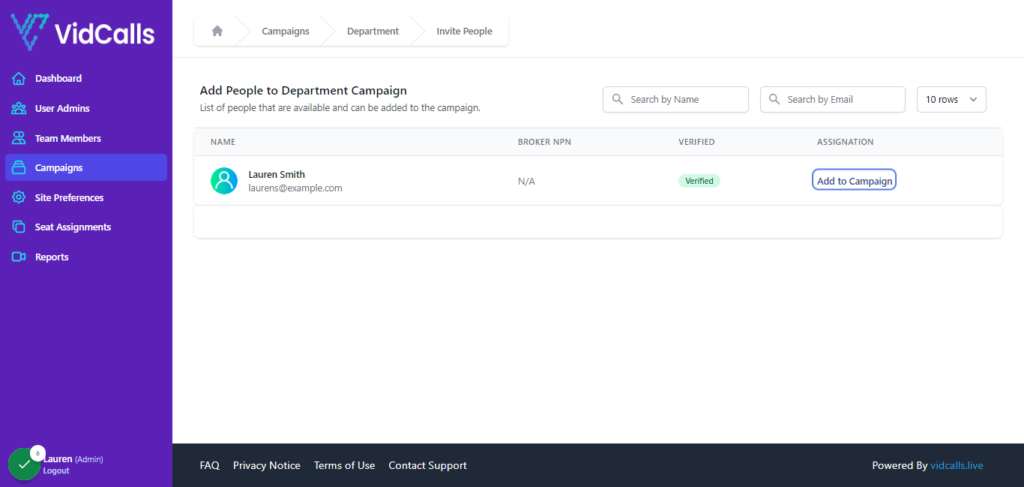
5. Click on Invite Team Members

6. This the list of Advisors available to add to the campaign
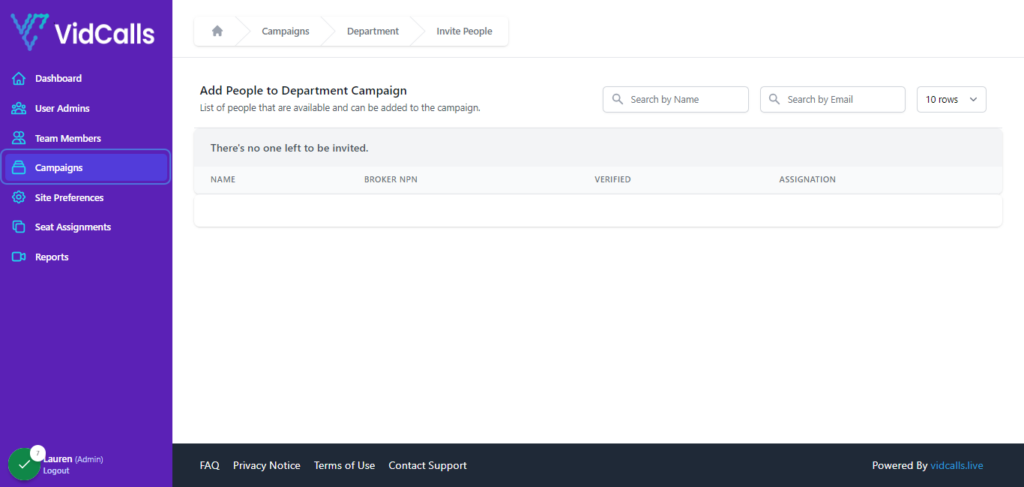
NOTE: This is only advisors who have registered and not been added to campaign yet. Advisors must be added to the Departments campaign before being added to the segment.

7. Click on Add to Campaign
8. Return to Campaigns tab
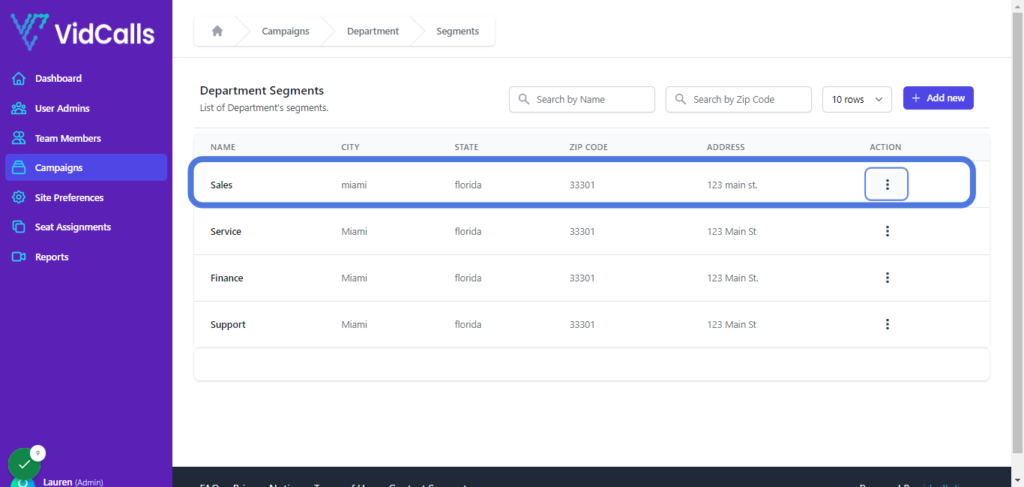
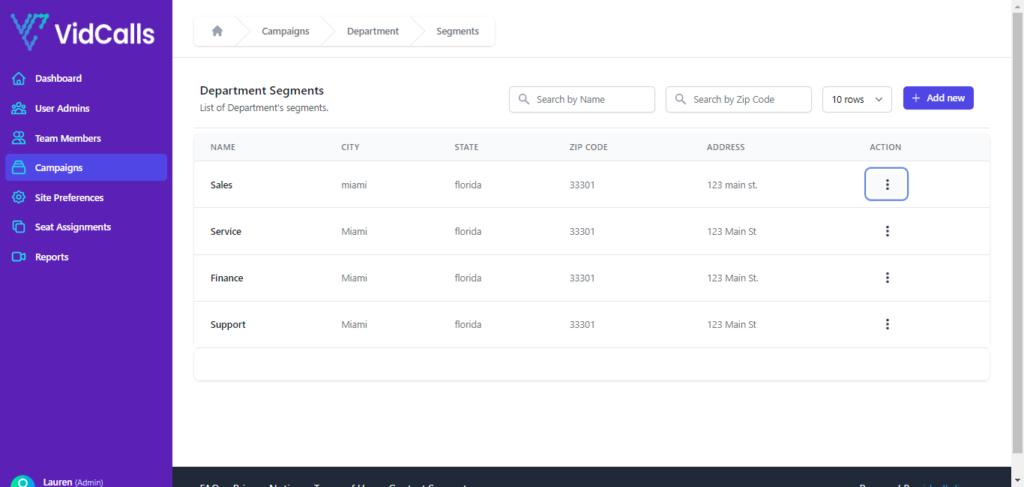
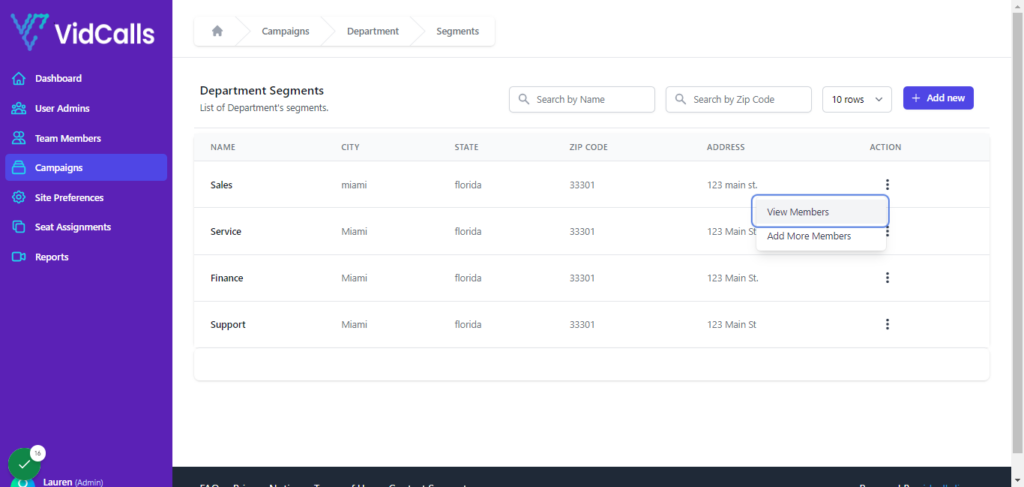
9. Click on Segments
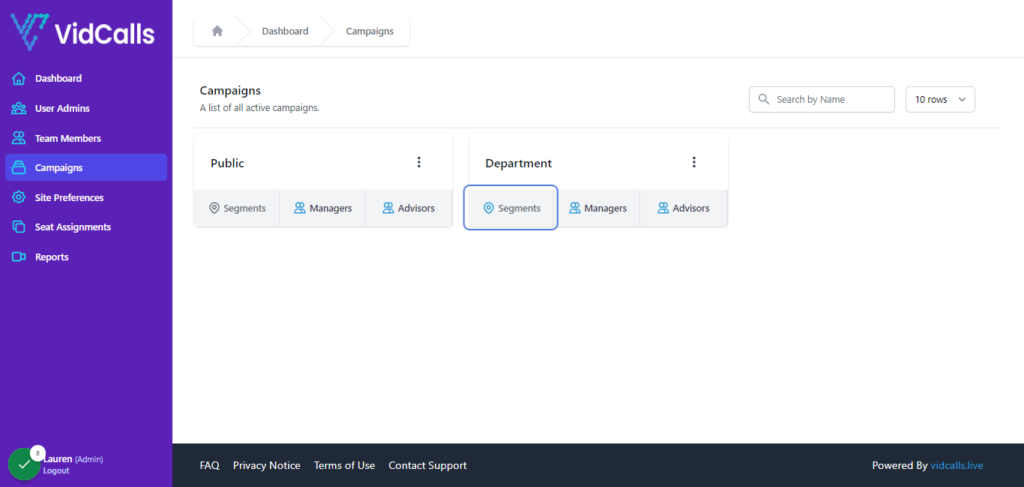
10. Here you will see the list of your segments
Go to the segment you want to assign advisors to
For our purposes we will use “Sales”
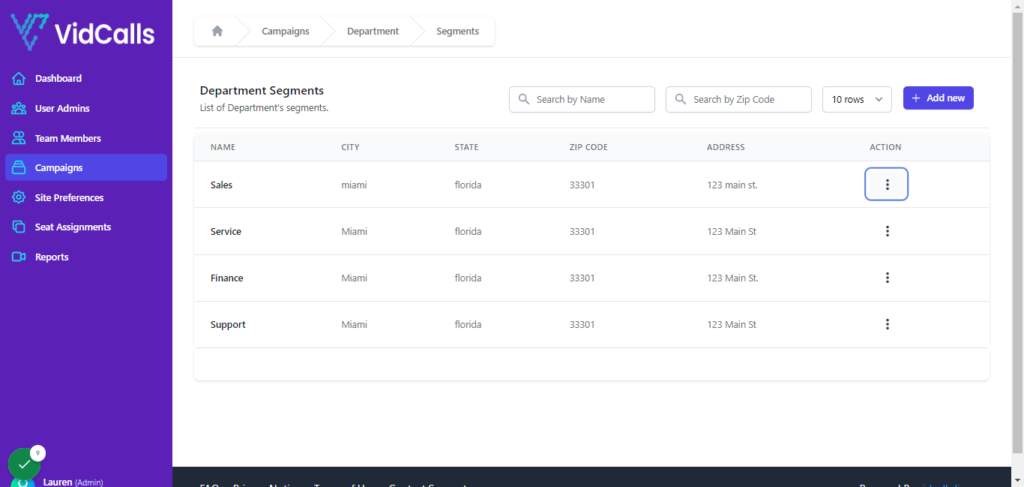
11. Click on dropdown trigger
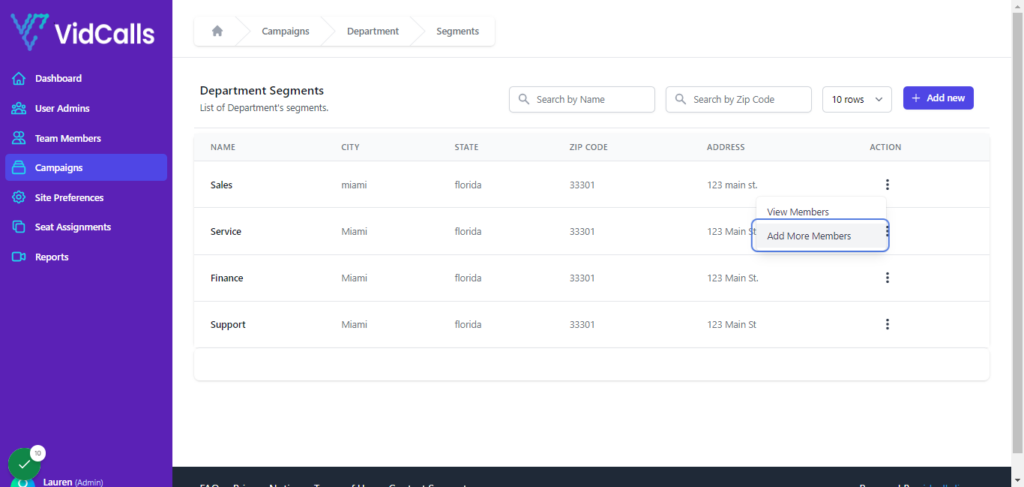
12. Click on Add More Members
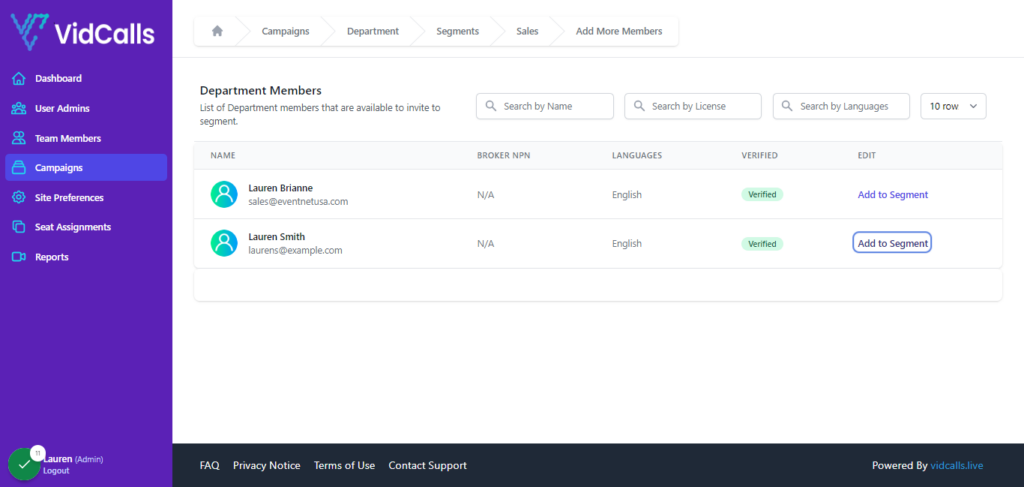
13. This is a list of available members who have not been assigned to that segment

14. Select the advisor you wish to add to the Sales Segment
For this example we’ll use Lauren Smith
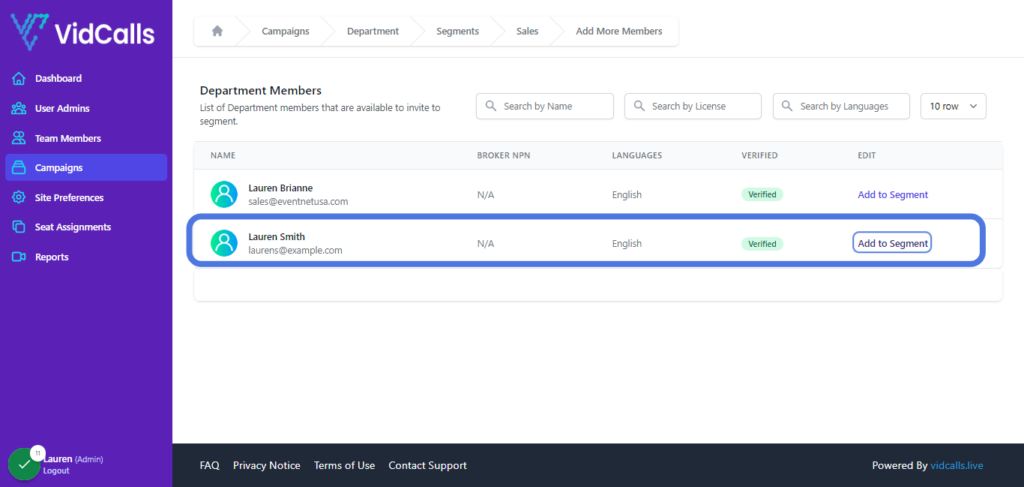
15. Click on Add to Segment
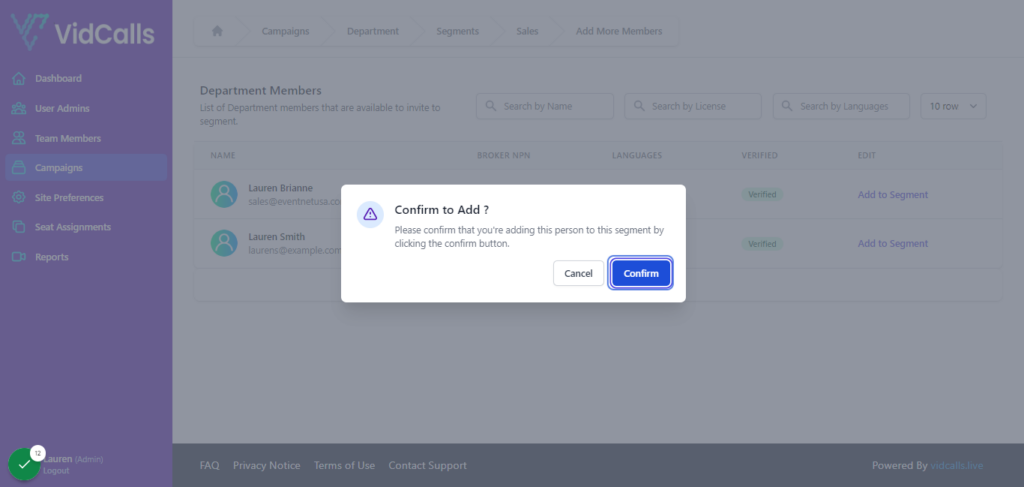
16. Click on Confirm
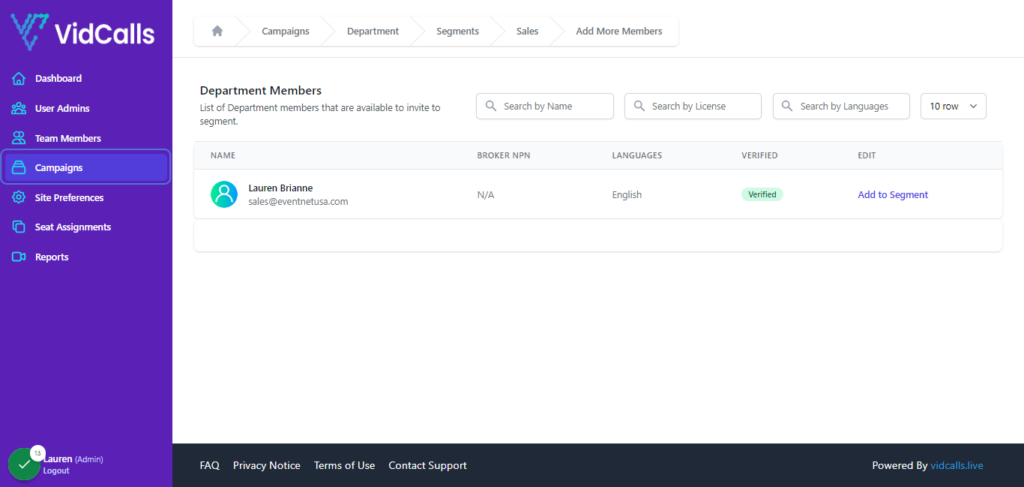
17. They are now added!
18. To view members in each segment
19. Click on Segments

20. Click on dropdown trigger for segment whose member you want to view
21. Click on View Members
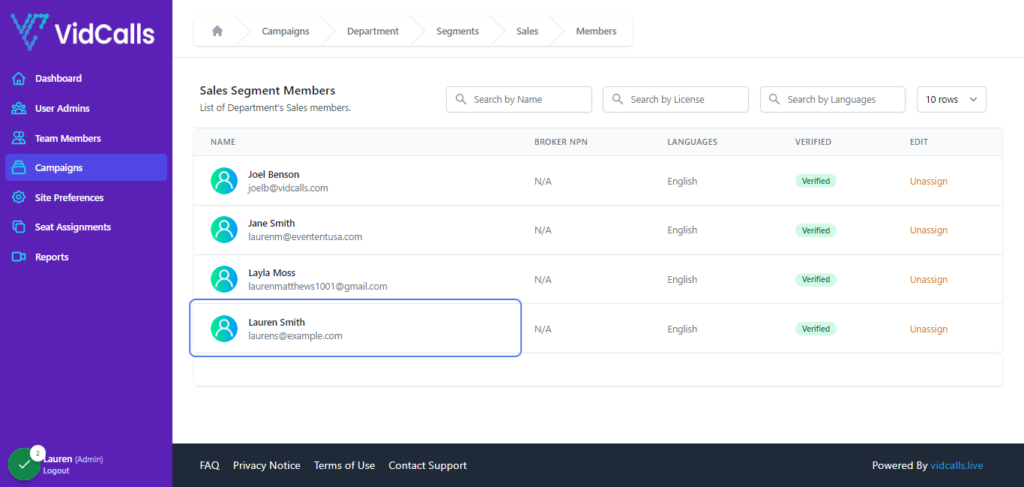
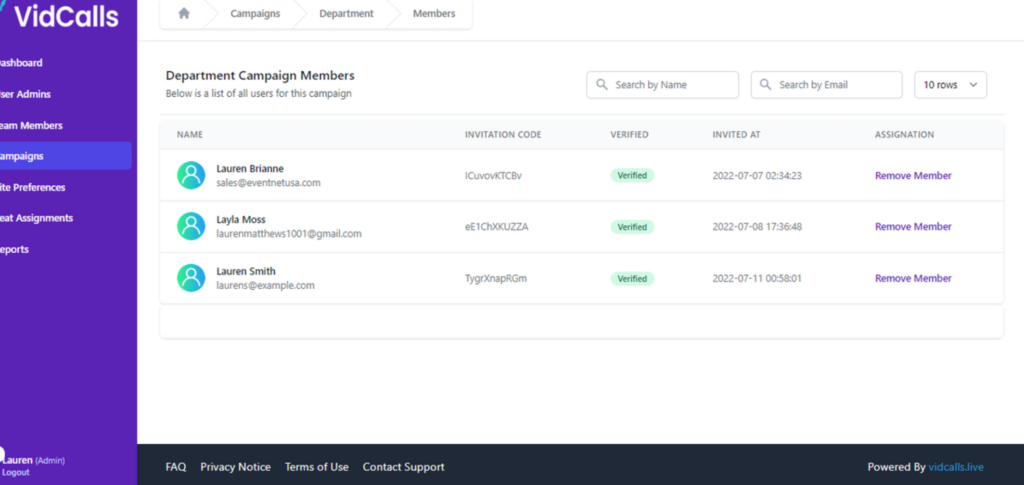
22. Here is the list of Sales Segment Members
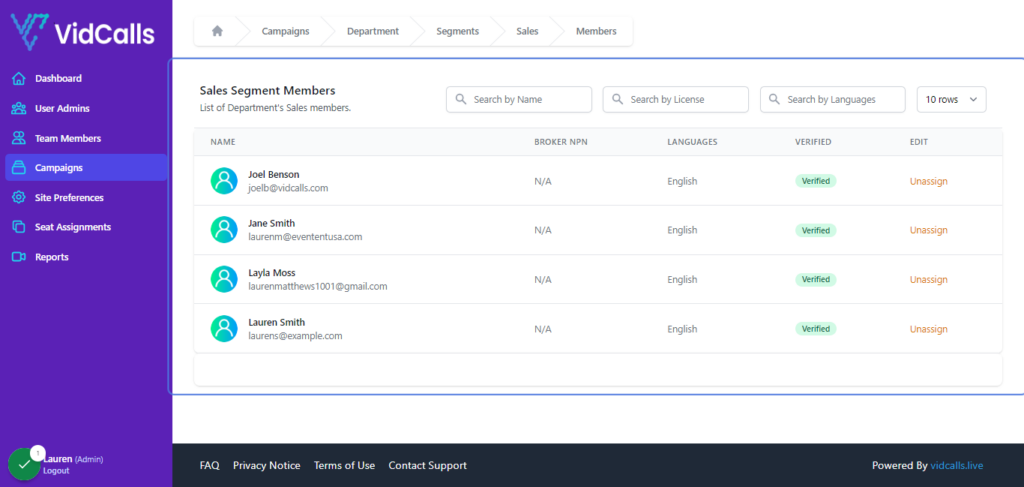
23. And the new member
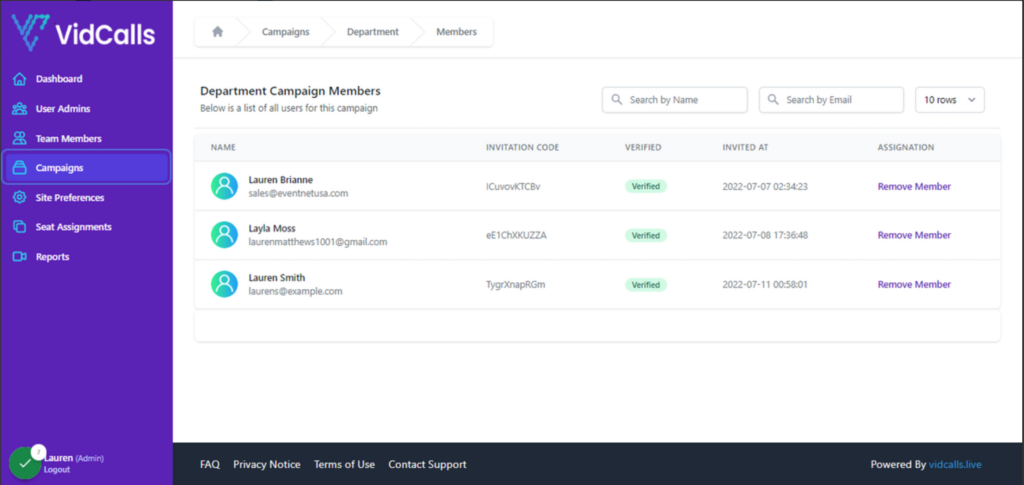
24. To View Campaign Members
25. Click on Advisors

26. Click on View Members
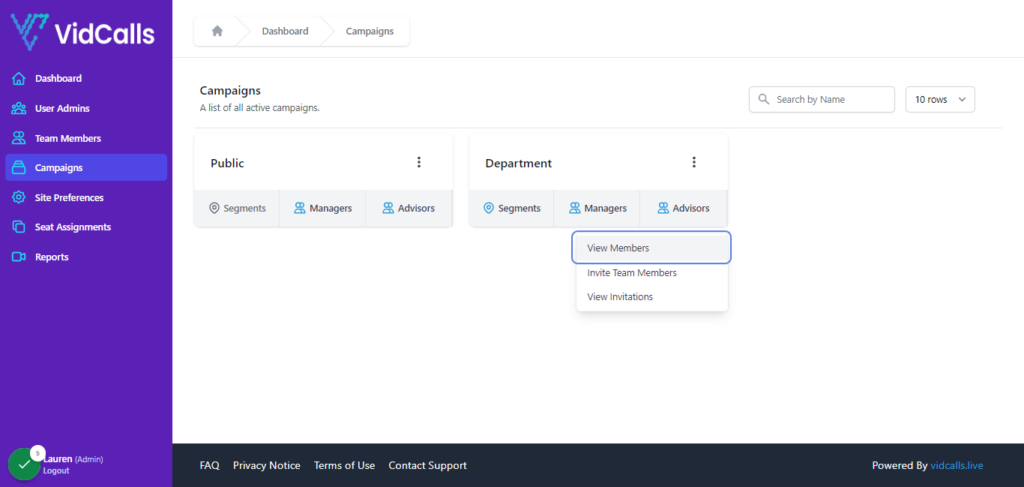
27. Here you can see all register advisors who have been added to the campaign
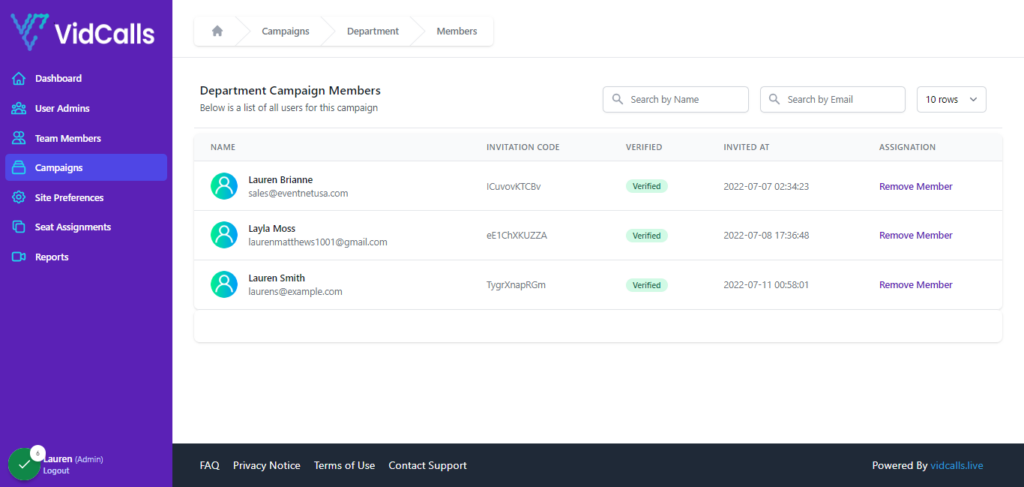
28. You can also remove members as needed
Note
Removing members will only remove them from the campaign & the campaign segment.
This means they will no longer receive inbound customer meeting requests from the DEPARTMENT Meeting Campaign.
They will still be registered as an advisor or seat under the account. To remove them completely see the “Advisor Guide”
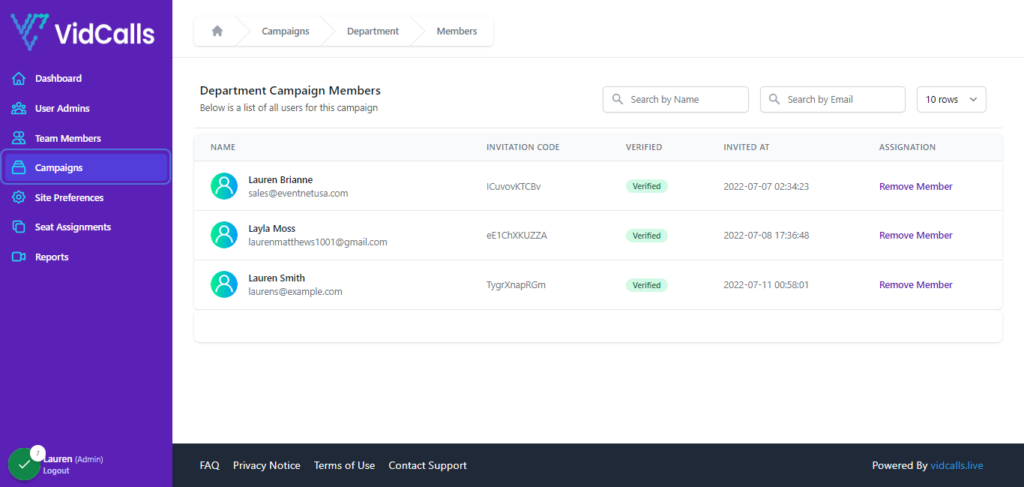
How to View Campaign Members
1. Return to “Campaign Tab”
2. Click on “Advisors”
3. Click on “View Members”
4. Now you can see all registered advisors who have been added to the campaign
How to Remove a Member
Removing members will only remove them from the campaign & the campaign segment.